Tuesday, November 6, 2012

Sweet Baby Gifts

There is nothing I love more than sweet little babies.  When my cousin Katie told me she was pregnant I was so excited for her and equally excited for me because that meant I got to make cute little baby gifts.  Well, then she told me that they weren't going to find out the sex of the baby until the delivery.  Oh man!  Now what was I going to do?  I am a planner so not finding out is something I could never do, but I will admit it was fun waiting for the text that the baby had arrived.  For her baby shower I sent her a cute little flower clip/headband (along with other gender neutral things) just in case she had a girl.  When baby day arrived we were all excited to hear "It's a BOY!!!!" Logan Matthew was finally here and that meant it was time to start crafting.  I had planned to go out to visit Katie and the baby in Colorado in mid July because she and the doctors thought that she would deliver a few weeks early (Katie was put on bed rest due to strong contractions for several weeks). Well, it turned out that she went past her due date so I would be flying out to CO just 5 days after he was born.  The first thing I did was make 2 cute bow tie onesies and I personalized a cute little baby hat.


Here is cute little Logan wearing one of his bow tie onesie:


Once I got to Colorado I wanted to help Katie decorate Logan's room.  They left things very neutral so they could add color once the baby arrived.  She said she wanted to do something with Logan's hands and/or feet prints and I had a few ideas.  I also told her I wanted to make letters for his name to put over the crib or where ever she wanted.  She told me a color scheme and I ran with it.  One afternoon while Katie and Logan were home resting my aunt, uncle and I set out for Hobby Lobby (with 5 coupons in tow of course).  I stood in the scrapbook paper section forever staring at all of my options.  She wanted to go with blues, greens and browns.  So many options and I am so indecisive when it comes to making things for other people.
Once I decided on the paper, I got the rest of the supplies and headed back to my aunt and uncles so I could start crafting.  Here is what I came up with:

Name and birth stats canvas:

Baby foot prints with baby inspired words canvas:
These 2 canvases I made using the sticker/paint technique I shared here.  I love how they turned out.  

Here is Logan's name 

I just love how it turned out.  Making these letters are one of my all time favorite gift for baby showers.

Remember, if you would like to give someone a personalized canvas as a gift or personalized name or letters, email me planestrainsandpb@gmail.com.  The cost for the letters are $8 per letter or $6.50 if you order 5 or more letters.  The price of the canvas depends on the size.  Also, I now have a Silhouette so the quality of lettering will be more perfect and the font options are almost endless.

Monday, November 5, 2012

Old Desk Turned New

My parents have had this old secretary desk for as long as I can remember.  When I was in high school, my parents put the desk in my room as a place for me to study and do my homework.  Well, it turned more into a junk collector than a spot to study.  For the past 12 years or so the desk has been moved all around my parent's house from my old room to the family room to the dinning room.  Well, now the desk has a new home in my sister's room along with a brand new look.  Here is the picture of the desk once we got the secretary top off:


The one thing we could not stand about this desk was that secretary top.  Since my sister just went back to school to get her Doctor of Physical Therapy degree, she wanted a space she could study.  The secretary top restricted the study space so immediately we got to work taking the top off.  Then my sister and I headed to home depot to pick out some paint and take a look new hardware.  My sister chose gray for the paint color and she didn't see any hardware she liked (in her budget) so we decided to just spray paint the old ones black.

Here is a picture of the process (taken from my sister's instagram):


And here is a picture of the final product in my sister's room piled high with her PT school papers:


Looks great, doesn't it?  I kinda wish I had taken the desk a few months ago when I first got the idea to refinish it.  I guess it's a good thing my sister got to it first.  She has 3 years of hard work, long nights studying and lots of reading ahead of her.  I am so proud of her in everything she has accomplished.  She graduated Cum Laude in Exercise Science while playing on her schools Soccer team for all 4 years.


Monday, October 29, 2012

Hurricane Day!

Well, Hurricane Sandy is heading our way so they canceled school for the next 2 days.  I have to say I am really enjoying my day so far.  The boys and I are enjoying breakfast and tv time in our jammies.  Our plans for the day all depend on how bad the weather gets.  It is supposed to rain all day and the winds are supposed to pick up later tonight.  As long as the power stays on today, my goal is to get laundry done since I did not do any over the weekend.  Last time we had a crazy wind storm (in June), our power was out for 3 days, but I'm hoping the power company is ready so not as many people are without power this time.

The hubs has the day off work today too so it looks like it's going to be one big family pajama party.  Hopefully I will have time to finish Halloween costumes (which I need to spray paint so i'm not sure how that's going to work) and carve our pumpkins.

I know I have been super slacking lately, but I am going to try really hard to post some new things.  I have some new projects as well as some old ones I need to share.  Keep a look out!!!

Tuesday, September 4, 2012

Back to School and Wedding Decor

Wow, it has been way too long.  I totally slacked once August came around and this is my 3rd week back at work.  My life has been consumed with teaching and then coming home to be a mommy.  I am completely exhausted  by the time the boys are in bed.

Before I go I will leave you with some wedding centerpieces and decor I did for my friends wedding.  She was the last of our group (all friends since middle school or before) to get married and I was so excited when she asked me to help her with the decor and basically be her Wedding planner.
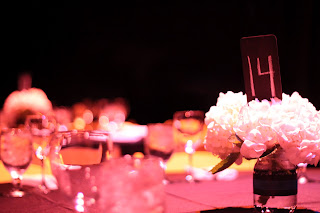
For her centerpieces she wanted to go for something small and simple.  We both said "Mason Jars" at about the same time.  I am so glad we were thinking the same thing.  here is what I came up with...


I started with thick black ribbon and placed a color ribbon in the middle on top of the black ribbon then glued them to the jar.  We used bright blue, green, pink and a black/white design.  Next I spray painted dowel rods and 1 side of small wood rectangles (found at Michaels) white.  The other side of the rectangles were sprayed with chalkboard paint.  The finishing touch was adding a bunch of white hydrangeas.  Everyone commented on how nice the centerpieces were.  At the end of the night, everyone was encouraged to take a centerpiece home and boy did they go fast (well, actually I took like 5 of them because I loved them so much).

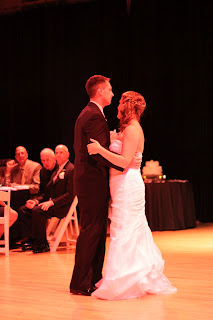
Here are a few more pictures from the wedding.

 I made Mr.&Mrs. chalkboard signs for their head table.  Even the DJ commented on how great they looked.  He even suggested I go into wedding planning (yeah, I wish I was that good!)

 Since I got a Silhouette for my birthday I decided to try and make a last name sign for their gift table.  My inspiration comes from Kara over at Mine for the Making.  She makes amazing signs and I have purchased a few signs from her for friends and one for myself too.  I still have a lot to learn, but I enjoy learning :)
Simple place cards.
The Hubs and I!

The new Mr. & Mrs. Ferrante

 Another crafty friend made these for the place card table.  Loved the pop of color.
 Here is


Instead of a guest book, the bride decided on a message board.  We made a sign that said "Please leave your wishes for the new Mr. & Mrs."  It turned out so cute.


One last picture.  Kara, me, Cari and Rachel.  Kara, Rachel and myself have been friends since 3rd grade.  We met Cari in 7th grade and the 4 of us have been friends ever since.  So many fun memories over the past 18+ years (YIKES I had no idea thats how long it has been)!
Another fun fact, Rachel and I both married our high school sweethearts and Cari married someone we knew in high school but they didnt start dating until after college.

Monday, August 6, 2012

Easy Peasy Cake Cookies

I am so excited to be sharing this recipe with you.  I was first introduced to this recipe here and have since changed it up and created some new ones.

Here is what you need: a box of cake mix, 2 eggs and 1/2 cup of vegetable oil

First pre-heat the oven to 350 and line your baking sheet with foil (I do this for easy clean up).  I do not spray my cookie sheet because there is a lot of oil in the cookies.  Then mix all of the ingredients together in a mixing bowl and mix until combined.


Form about 1 inch balls (maybe a little smaller than a golf ball) and place on the cookie sheet.  I added mini chocolate chips to some of my strawberry cookies.


Place the balls about 2 inches apart.  They will spread a little.

Bake at 350 degrees for about 9-10 minutes.  When you take them out, they will look like they are not quite done, but let them sit out for a few minutes and they will get that hard crust on them.

The last step is to taste test while they are still a little warm.  You know, you have to make sure they are good enough to share with your family and friends.  I shared these cookies with our sweet neighbor.  She loves to garden  and Carson was helping her water her flowers while she was planting them this spring. One morning we woke up to a small bouquet of hydrangeas on our front porch with a note for Carson.  He was so in love with the flowers and couldn't wait to bring her cookies as a Thank You.


This recipe is so easy to change up.  All you need to do is change the kind of cake mix.  I have used Devil's Food, Strawberry, Funfetti and Red Velvet.  I also like to add different things into the batter like chocolate chips, peanut butter chips and white chocolate chips.  I was thinking Lemon cake mix would make delicious cookies too.  So make choices!  Here is a picture of the Red Velvet Chocolate Chip cookies I made yesterday for a family BBQ.  They were a huge hit!


I'm Back!

After a few short long weeks, my computer is back up and running.  Turns out our hard drive was bad... again :(  We had hard drive issues less than 2 years ago (the computer is only about 2 and a half years old) so luckily everything was still under warranty.  I am just so happy to have my computer back.

I have been working on so much over the past few weeks and I cant wait to share it you.  Here is a little list of what I have planned over the next 2 weeks: nursery wall decor, wedding center pieces and accents, desk face-lift,  back to school teacher gift idea, and lots and lots of recipes (including cookies, enchiladas, tacos, summer pasta).

Check back soon for the first project, Nursery Wall decor and the first recipe, Easy Peasy Cookies!

Wednesday, July 18, 2012

Life without a Computer

I am so sorry I have been MIA for over 10 days.  Our computer died last week and we are trying to get it replaced since the warranty is not up yet.  Ever since we got this computer we have had nothing but problems.  First, the computer had a faulty hard drive and it erased everything from the hard drive about 8 months after getting it.  I am still not over losing ALL of my pictures.  Then over the last 2 years the computer has had it moments where it has been slow and acting funny.  Then, last week when my husband was using the computer it said that there was a hard drive problem and could not turn on.  Thank goodness we have backed up all of our things.
Well, I am not sure when I will be back since I have to come over to use my parent's computer, but I will try my best.  I have so many new projects and recipes I am dying to share with you. They will have to wait until next week though because I am headed to Colorado tomorrow :)  I am so excited to meet my new baby cousin, Logan, and get a few lots of baby cuddles in.  I made Logan a few things so I can't wait to see them on him.  I am also really excited because I get to help decorate the nursery!  Since my cousin did not find out what she was having, they left things pretty neutral.  I have so many project in mind and I hope she likes them.

Check back late next week for an update.  Hopefully the husband will get the computer stuff figured out while I'm gone, you know, in between chasing after the boys ;)

Friday, July 6, 2012

Fashion Friday


Happy Friday everyone!  Today I thought I would share with you my idea of fashion. Now, I am slightly obsessed with Pinterest so here are some of my favorite pinterest finds for fashion.


This is definitely my style right now!
Springtime! <3
cozy outfit

Outfit

Summer
Outfit

This is so me!

so casual and comfy

**All images were taken from Pinterest

Well, these outfits pretty much represent me.  I love jeans (very self conscious about my legs), comfy and casual shirts, zip-ups and hoodies, flip flops, ballet flats and my new love, TOMS.  Most of my clothes are grey, blue, white and black with splashes of pink.  I am really trying to add more color and pattern in my closet.  Lately I have been drawn to strips.  I just bought 2 new striped shirts and I LOVE them.
Now that it is summer you will find me in Bermuda shorts, capris or shorts with a tank.  
I hope you liked learning a little about my style.  Feel free to follow me on pinterest!


Tuesday, July 3, 2012

Quote Canvas Art {Tutorial}

Before Spencer was born I made a subway art canvas for his bedroom.  I did not (and still do not) have a cricut or silhouette to cut the vinyl, but I was able to borrow a cricut from a friend.  This is what I came up with:


I really love how it turned out and every time I go into Spencer's room it makes me smile. I have been wanting to make another canvas for the playroom, but again I do not have a machine. I am obsessed with Pinterest and I came across a way to make a painted canvas using stickers.  My sister had a birthday present to make for her friend and decided she wanted to try and make a quote on a canvas using the method we saw on pinterest.  First she painted the canvas she wanted to color of the words to be:


Then she added the stickers where she wanted them to go.  Before she did that she decided that she wanted some of the words to stand out so she used another color as well. *Sorry it is sideways*


The next step is to paint over the entire canvas with a different color.


The final step is to carefully peal off the stickers.  My sister used a safety pin to help her pull the edges up.


She also added some small rhinestones and little flowers that I had in my supplies to give it more details.  The colors match her friends room and her friend absolutely love it.
Here is a picture of another one she made for herself:


The canvases came in a 2 pack at Walmart for about $8, the stickers were $2.99 per pack (bought 3 packs) at Michaels and they actually ended up being buy 2 get 1 free.  The paints I had on hand, but are under $1 each.  That is $14 for both projects not including all of the supplies I already had on hand.


I hope you are now inspired to make some artwork as a gift or for your house!

Monday, July 2, 2012

Let there be POWER!

Sorry I have been MIA for a few days.  Last week we had a jammed packed week of fun activities then on Friday night we had a crazy storm and we lost power.  Now normally I would not mind losing power for a day or 2, but we were projected to be without power for a week and it was about 97-100 degrees plus humidity making it feel like 105+.  Luckily my parents, who live less than 5 miles away, had power so Saturday morning we packed up the fridge/freezer, some clothes and the kids and headed over to their house.  It was a little cramped at my parents house, but boy did it beat staying at our house.  After only 2 days without power, the power came back on Sunday night.  I am so glad to be back home and I am looking forward to sleeping in my bed.  
Please check back this week for some new posts.  I'll give you some hints... canvas art work, summer bucket list and a little fashion.  

Tuesday, June 26, 2012

The perfect Baby Shower Gift

Over the past 4 months there have been so many babies being born.  I have had to get gifts for 2 close friends, my sister in law, my cousin, a friend of the family and 6 co-workers all in the past 5 months.  My favorite gift to give is a homemade gift.  I love to craft and I feel like it means more when I make something that is personalized.  Enter the personalized wood letter:
This one I made for the daughter of my son's daycare provider.  She told me the nursery was a pinkish coral color and white.  


Here are some more that I have made:
 This one was for my team member who was doing a grey, pink and white nursery for baby Gia.  She absolutely loved the letters.


 This letter J is for little Jackson, the son of another team member.  


 The letters H, S and W I made 2 summers ago for some fellow teachers.  


This one I made 2 years ago for my cousin's daughter, Jordan.  Jordan was turning 7.  The J, D and N have ribbon and/or flower embellishments and the O,R and A have small rhinestones.  


Now here is something I would like to do.  I would like to start taking orders for personalized letters, whether it be a first initial, all initials or the first name.  The top 3 are made with 9 inch letters.  The bottom 2 are made with letters that are probably about 6 inches, but I have not been able to find them anymore.  I made those letters 2 years ago and I was living in another state.
The price would be $8.50 per letter for the 9 inch.  If you are ordering 5 or more letters, the price would be $7 per letter.
If you are interested in ordering some, please email me at planestrainsandpb@gmail.com


**Sorry for the quality of the pictures. Most of them were taken with my phone.